Presets for Lightroom are pre-defined settings that enhance and transform your photos with just one click. This guide shows you how to import these presets into Adobe Photoshop Lightroom Classic and adjust them as needed.
-
Open Adobe Photoshop Lightroom Classic
-
Import Presets
Navigate to
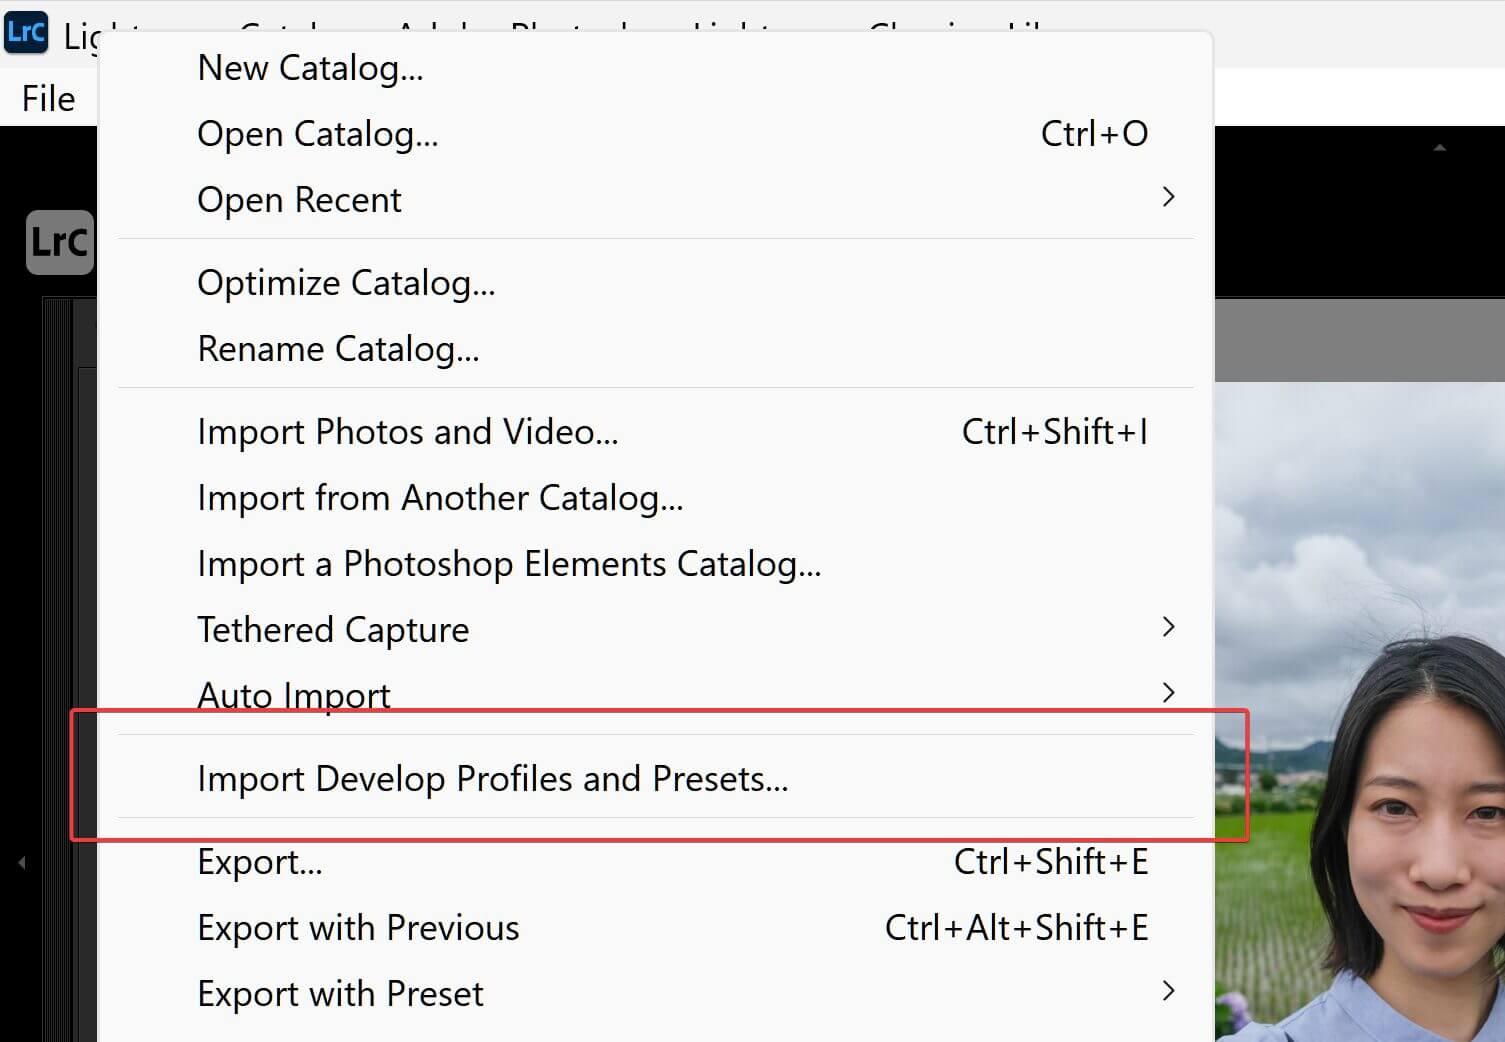
File>Import Profiles & Presets. Import .xmp files or a .zip archive containing the .xmp files.
-
Access Presets
Click the Develop tab near the top-right corner of the interface.

-
Select a Preset
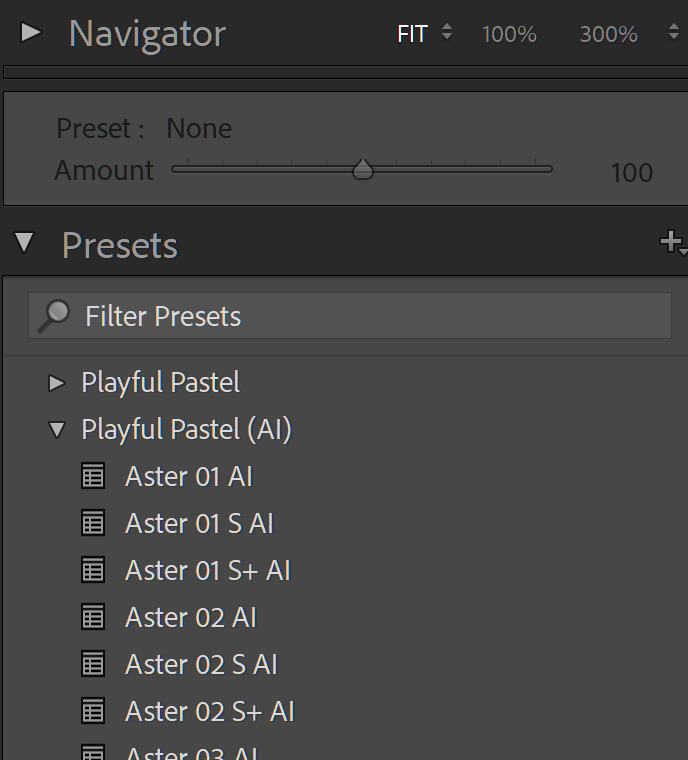
You should see the Presets panel on the left side of the interface. Choose a preset from the list to apply it to your photo.

-
Adjust the Preset Amount
Above the Presets panel is the Amount slider. Drag the amount slider to make the preset more subtle or stronger.

Frequently Asked Questions
Can I import .lrtemplate presets?
Yes, you can import .lrtemplate presets, but you will see a compatibility warning. To view these presets in the Presets panel, click on the three dots menu icon at the top-right of the Presets panel and enable “Show Partially Compatible Presets.”
Can I import DNG files as presets?
You can import DNG files into your library, copy the settings, and save them as a preset. For convenience, it’s best to import XMP files if they are available.
How can I choose which presets to show or hide?
In the Presets panel, click on the three dots menu icon at the top-right of the panel and select “Manage Presets.” Here, you can choose which presets to show or hide.
Can the presets be displayed as thumbnails like in Adobe Photoshop Lightroom
No, in Adobe Photoshop Lightroom Classic, presets are displayed in a list view only. You can preview the effects of presets by hovering over them, but they are not shown as thumbnails.
What’s the difference between the preset amount and profile amount slider?
The Preset Amount slider adjusts all settings within a preset, including the profile, while the Profile Amount slider only affects the profile settings without altering other adjustments.


